
Thinking about backpacking across the US? Wondering if your European or Southeast Asian budget will hold up? Let me tell you straight: it’s a different beast entirely. After countless miles and more than a few busted tires, I’ve got some hard-earned lessons to share. This isn’t some aspirational guide; this is the reality of what works, what breaks, and what simply isn’t worth your money here.
Choosing Your Backpack: Don’t Skimp Here
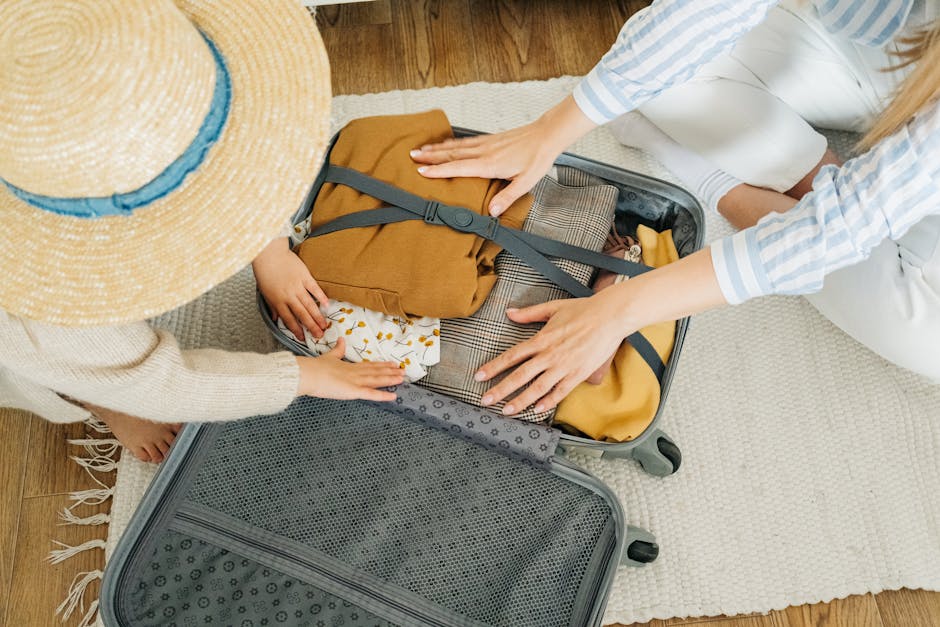
If there’s one piece of gear where you absolutely cannot compromise, it’s your backpack. I’ve seen too many new travelers trying to save a buck with cheap bags, only to ditch them halfway through their trip due to torn seams, broken zippers, or just unbearable discomfort. Your pack is your home on your back. Invest wisely.
Capacity vs. Comfort: My Rule of Thumb
For a multi-month US trip, a 45-65 liter pack is generally ideal. Anything smaller, and you’ll struggle with cold weather gear or resupplies. Anything larger, and you’ll overpack. I learned this the hard way hauling a 75L monster for my first cross-country trip. My shoulders still ache thinking about it. Comfort wins over capacity every single time. A well-fitting 50L pack with external attachment points beats a poorly fitting 70L pack that swallows everything but feels like a brick.
Key Features I Look For
- Adjustable Torso Length: Non-negotiable. Your back isn’t one-size-fits-all.
- Robust Hip Belt: Most of your pack’s weight should ride on your hips, not your shoulders. Look for thick padding and a secure buckle.
- External Pockets: Water bottle pockets you can actually reach while wearing the pack. A large front stretch pocket is perfect for drying wet clothes or stashing a map.
- Access Points: Top-loading is standard, but a U-zip or J-zip front access can be a lifesaver for finding that one item at the bottom without emptying everything.
My Top Picks (and Why)
For years, I’ve stuck with a few brands that consistently deliver. The Osprey Atmos AG 65 (for men) or Aura AG 65 (for women) is my go-to. Yes, it’s pricey—expect to pay around $270-$300. But the Anti-Gravity suspension system is a . It makes a heavy load feel significantly lighter, and the ventilation is unmatched. You won’t arrive at camp with a swampy back. Another solid choice is the Deuter Aircontact Lite 65 + 10, usually around $220. It’s a bit heavier than the Osprey but incredibly durable and also offers excellent ventilation and load transfer. I’ve seen these packs take a beating for years and keep going. Don’t buy a cheap Amazon special for $60; it will fail you.
Budgeting for the USA: It’s Not as Cheap as Southeast Asia

Let’s get real. Backpacking the USA is expensive. If you’re coming from regions where $20 gets you a private room and three meals, prepare for sticker shock. The US demands a different approach to budgeting. I’ve met too many travelers who ran out of money halfway through because they underestimated daily costs.
Daily Cost Breakdown: What to Expect
I aim for a daily budget of $50-$70, and that’s being pretty frugal. Here’s how it generally breaks down:
- Accommodation: $0-$30. This is your biggest variable. If you camp on public lands, it’s free. Hostels typically run $25-$40/night in major cities. Motels are $60+ easily.
- Food: $15-$25. Cooking your own meals is key. Eating out, even fast food, quickly adds up. A basic diner meal can be $15. Groceries are cheaper, but still more than many other countries.
- Transportation: $0-$50+. Hugely variable. If you hitchhike, it’s free (but often unreliable and not recommended everywhere). Buses (Greyhound, FlixBus) can be $20-$100+ for intercity travel. Train travel (Amtrak) is scenic but usually more expensive. Car rental? Forget it on a tight budget unless splitting with a group. Fuel costs are real.
- Activities/Sightseeing: $0-$20. National Park passes are $80 for an annual pass, which is a steal if you visit multiple parks. Many city museums have free days. Otherwise, entrance fees can be $10-$30 per attraction.
You can certainly do it for less, but it requires significant effort in finding free camping, cooking every meal, and minimizing paid activities. Don’t plan on hitting every major city and tourist trap if your budget is strict.
Smart Spending on Food: Your Wallet’s Best Friend
This is where you save real money. I buy groceries from large supermarkets like Walmart, Kroger, or Safeway. Avoid convenience stores for staples; their prices are inflated. My go-to cheap meals include oatmeal for breakfast, peanut butter and jelly sandwiches for lunch, and pasta or rice dishes with canned tuna or beans for dinner. Instant coffee is your friend. Carry a reusable water bottle and fill up everywhere; bottled water is an unnecessary expense. Learn to love the dollar menu at fast-food joints for a rare treat, but don’t make it a habit.
Free Accommodation Hacks: My Secret Weapons
My number one hack is Boondockers Welcome (now part of Harvest Hosts) or similar platforms for finding free overnight parking on private land if you have a vehicle. For tent camping, I rely heavily on Bureau of Land Management (BLM) and National Forest lands. These areas often allow dispersed camping for free, meaning no facilities, just find a spot and set up. Apps like iOverlander or The Dyrt are invaluable for locating these spots and reading recent reviews. Hostels are a necessary evil in cities, but try to limit them to a few nights a week.
Transportation Realities: Forget Hitchhiking, Mostly
Unlike some parts of the world, hitchhiking in the US isn’t widely accepted or safe in many areas. While it’s legal in most states, finding a ride can be tough, and I personally don’t recommend it as a primary travel method for a backpacker. The vast distances and car-centric culture make it impractical and often risky. Here’s what actually works:
-
Buses (Greyhound, FlixBus, Megabus)
These are your cheapest options for intercity travel. Greyhound has the most extensive network, reaching even smaller towns. FlixBus and Megabus often offer better prices on popular routes between major cities, especially if you book well in advance. Downsides: they can be slow, schedules sometimes unreliable, and comfort is minimal. I’ve spent 24+ hours on a Greyhound, and it’s not glamorous. But it’s cheap, sometimes as low as $30 for a cross-state trip.
-
Train (Amtrak)
Amtrak offers stunning scenic routes, especially through the Rockies or along the West Coast. It’s generally more comfortable than a bus but significantly more expensive and less frequent. Think of it as a splurge or for specific routes where the journey is part of the experience. A multi-day pass can sometimes be a good value if you plan extensive train travel.
-
Rideshares (BlaBlaCar, Craigslist Rideshare)
Platforms like BlaBlaCar (though less popular in the US than Europe) or even Craigslist’s rideshare section can connect you with people already driving your direction. Always exercise extreme caution, meet in public places, and trust your gut. I’ve had good experiences, but also some sketchy ones. It’s a gamble, but can save you a lot of money and sometimes get you off the beaten path.
-
Car Rental (for groups)
For solo backpackers, car rental is usually prohibitively expensive ($50-$100+ per day plus fuel). However, if you’re traveling with 2-3 others, splitting the cost can make it a viable, and often the most efficient, option. Rentals give you unparalleled freedom to explore National Parks and remote areas inaccessible by public transport. Look for deals on sites like Kayak or Expedia, and always factor in insurance.
-
Cycling/Walking (for specific routes)
For specific long-distance trails like the Appalachian Trail (AT), Pacific Crest Trail (PCT), or Continental Divide Trail (CDT), your feet are your primary mode of transport. For shorter stretches or exploring cities, walking and cycling are fantastic. Many cities have bike-sharing programs (e.g., Citi Bike in NYC, Divvy in Chicago) for short rentals.
Common Gear Mistakes I Made (So You Don’t Have To)
I’ve hauled so much unnecessary weight and cursed so many broken items. Learn from my poor choices and pack smart.
| Mistake I Made (Don’t Buy This!) | Why It Was Bad | My Recommendation (Get This Instead!) | Why It’s Better |
|---|---|---|---|
| A bulky, heavy cotton sleeping bag | Takes forever to dry, heavy, poor warmth-to-weight. | Enlightened Equipment Revelation APEX quilt (synthetic) or Feathered Friends Flicker UL (down) | Lightweight, packs small, dries faster (synthetic), superior warmth (down). Down is $400+, synthetic quilt is $250. |
| Cheap, heavy hiking boots | Blisters, slow drying, unnecessary weight for most trails. | Altra Lone Peak trail runners or Hoka Speedgoat | Lighter, dry faster, more comfortable for most long-distance hiking in good weather. Your feet will thank you. |
| Bulky travel towel (microfiber, but still thick) | Takes up too much space, often doesn’t dry fast enough. | PackTowl Nano or any thin, quick-dry camping towel | Minimalist, dries almost instantly, packs down to nothing. Just get the smallest one that covers your essentials. |
| Expensive, heavy water filter pump | Slow, prone to clogging, unnecessary. | Sawyer Squeeze filter ($35) or Katadyn BeFree filter ($45) | Fast, lightweight, reliable, easy to clean. These are the gold standard for backpackers. Carry a Nalgene for collection. |
| Buying an actual paper map for every state | Heavy, takes up space, quickly outdated. | Offline maps on your phone (e.g., Gaia GPS, AllTrails Pro) + a small compass | Digital maps are lighter, constantly updated, and offer GPS tracking. Always carry a small power bank to keep your phone charged. |
Finding Free Campsites: My Go-To Resources
One of the best ways to keep your US backpacking budget in check is to camp for free whenever possible. It’s totally doable, but you need to know where to look. I rarely pay for camping unless I’m in a National Park with no other options, or if I need specific amenities.
- Bureau of Land Management (BLM) Land: My absolute favorite. Vast tracts of land, primarily in the Western US, where dispersed camping is permitted for up to 14 days in most areas. Look for signs that say "primitive camping" or "dispersed camping." Always follow Leave No Trace principles.
- National Forests: Similar to BLM land, National Forests also allow dispersed camping. Rules can vary, so always check the specific forest’s website or visitor center for regulations.
- iOverlander App: Essential. This app is community-sourced and has pins for thousands of free and low-cost campsites, water sources, and dump stations across the US. User reviews are invaluable for current conditions.
- The Dyrt App: Another great app, with a vast database of campgrounds, including many free options. The Pro version offers offline maps and even more filters for finding specific types of sites.
- Walmart/Cabela’s/Cracker Barrel Parking Lots: Many of these stores allow overnight RV and van parking, and sometimes tenters if you’re discreet. Always ask permission inside first. It’s not glamorous, but it’s free and safe for a night.
- Rest Stops/Truck Stops: Some states permit overnight parking at rest stops. Truck stops generally do, and often have showers (for a fee) and food. Again, not for tenting, but if you’re sleeping in a vehicle.
Staying Connected on the Road: eSIMs are Your Best Friend
Forget hunting for physical SIM cards. Get an eSIM before you even land. It’s convenient, often cheaper, and you can switch plans on the fly. I’ve used Airalo and Holafly multiple times, and they’ve saved me so much hassle. You just activate a data plan, and you’re good to go.
Essential Safety Practices: Solo Travel Doesn’t Mean Reckless
Solo travel in the US is incredible, but it’s not without its risks. Common sense goes a long way, but so does preparation. I’ve had my share of close calls, and it always came down to either poor planning or ignoring a gut feeling. Don’t be that person.
Is Solo Hiking Safe?
Generally, yes, especially on popular trails. But you need to be self-sufficient. I always carry a personal locator beacon (PLB) like a Garmin inReach Mini for emergency satellite communication when I’m out of cell service. It’s a $350 investment with a monthly subscription, but it’s literally saved my life once and countless worries for my family. Tell someone your itinerary, even if it’s just a text to a friend before you head into the backcountry. Know your limits, both physical and navigational.
What About City Nightlife?
Cities are different. Stick to well-lit, populated areas. Don’t flash expensive gear or cash. Use rideshare apps (Uber, Lyft) if you’re out late, rather than walking alone. I avoid walking through desolate areas at night, especially in unfamiliar cities. If a situation feels off, it probably is. Just leave.
How to Handle Emergencies?
Always have a small first-aid kit, even for minor scrapes. For bigger emergencies, dial 911 immediately. Know the nearest hospital or urgent care clinics. If you’re backpacking solo, carry a spare set of car keys if you have a vehicle, or a backup method to access your money. Having a small "go-bag" with essentials ready to grab in a hostel fire is also a good habit. Trust your intuition above all else.
Backpacking the USA is a journey like no other. It challenges you, it rewards you, and it shows you a side of the world you simply can’t get from a tour bus. The landscape is vast and varied, the people are generally welcoming, and the opportunities for adventure are endless. Go prepared, go smart, and you’ll come back with stories you’ll tell for a lifetime.


